Monday, January 30, 2012

Pumpkin Cinnamon Buns: A Great Start to a Holiday Morning

[This is an old bit that I never got around to posting. OOPS! My holiday rantings are a little out of season, but the recipe is still a great one to try any time of the year.]

When I was growing up, every Christmas morning my Mom would make Pillsbury Cinnamon Rolls. You know, the kind in the little cardboard tube that you have to rap on the corner of a table to pop open? How fun is that, by the way? I think she did this primarily because she was so busy with a house packed full of people and presents and in the midst of preparing a big afternoon meal. Breakfast needed to be something simple and quick. The fact that she never seemed to make those cinnamon buns at any other time (she rarely used factory produced foods) made them somehow a special tradition. This past Christmas Eve, my brother Dave shared that he and his family still eat the Pillsbury buns every Christmas morning. "And not the fancy kind, either, " he said, "We tried them and they weren't right. It has to be the original kind."


We have our own traditions in our small family. For many years, I have made an often elaborate breakfast on Christmas morning. I try to make a nice sit-down morning meal because the rest of the day is spent visiting and grazing. The week before Christmas I found a recipe for pumpkin cinnamon buns. I thought it would be a nice way to honor the old cinnamon bun tradition and add a new twist. I and my family are all fans of sweets containing pumpkin—pies, scones, muffins, cakes, custards. It is all good. And, adding pumpkin to things is a great way to up the nutritional value.
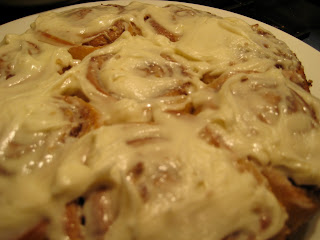

The buns I made were largely following a recipe on GoodLife Eats. My only changes were to add some chopped pecans to the filling, reduce the butter a bit, and change up the icing a little. They were a little time consuming to make, but I must say, the results were well worth the effort. Next time, I would mix up the dough, do the first rise, and assemble the buns the night before, leaving just the final rise and baking for the next morning. I am not even sure the icing is even needed as it distracts from the pumpkin and spice flavors in the rolls and makes them a little too sweet for my liking. Jim, on the other hand, went to town on the icing.


I served these cinnamon buns up with a rosemary potato frittata, fresh fruit, and some thick-slice Vermont maple bacon. Mmmmm!

Pumpkin Cinnamon Rolls with Maple Cream Cheese Icing

Dough:
1/4 cup warm water
1 package active dry yeast
1/3 cup warm milk (I used leftover eggnog and reduced the sugar a bit)
1 large room temperature egg, beaten
3/4 cup pumpkin puree
1  Tbs. melted butter
1 1/2 to 2 cups All-Purpose Flour
1 1 /4 cup Whole Wheat Pastry Flour
1/2 cup brown sugar (a little less is fine)
1 teaspoon salt
3/4 teaspoon cinnamon
1/4 teaspoon ground ginger
1/4 teaspoon ground cardamom

Filling:
5-6 Tbs. butter, room temperature
1/2 cup white sugar
1/4 cup brown sugar
1/2 to 3/4 cup finely chopped pecans
2 teaspoons cinnamon
1/2 teaspoon each of allspice and ginger
1/4 teaspoon nutmeg
1/8 teaspoon cloves

Icing:
4 ounces cream cheese, room temperature
6 Tbs. butter, room temperature
1/2 tsp. maple extract
About 2 cups powdered sugar

Combine the yeast and water in a large bowl and let the mixture rest for 5 minutes until foamy. Add the milk, eggs, pumpkin, butter, whole wheat flour, brown sugar, salt, and spices to the yeast mixture. Stir vigorously until well-combined.

Add the AP flour, starting with 1 1/2 cups and adding more as needed, until the dough is stiff enough to knead. Knead the dough on a floured surface, adding flour as necessary, until it is smooth and elastic.

Place the dough into a greased bowl. Turn the dough in the bowl to coat the entire ball of dough with oil. Cover with plastic wrap and let it rise in a warm place until doubled, approximately 1 hour.

Combine the filling ingredients, except butter, in a another bowl; set aside.

When the dough has risen amply, pat or roll it into a 16" x 12" rectangle. Spread it with butter and top evenly with the sugar/spice mixture.

Roll the dough into a log the long way. Using a very sharp knife, slice the log into 16 pieces. Place the pieces in a two 9” round cake pans. Cover with a towel and let the buns rise until almost doubled, about 45 minutes.

Preheat your oven to 375° F. Bake the rolls until they are brown around the edges and beginning to turn golden brown across the center, about 20-30 minutes.

While the rolls bake, prepare the cream cheese icing. Whip the cream cheese, butter, and extract in a medium bowl using a hand mixer. Add the powdered sugar 1/2 cup at a time, blending in between, until well mixed and the desired consistency is reached.

Frost warm rolls with the icing and serve immediately.

Saturday, January 28, 2012

Flourless Chocolate Cake with Creme Anglaise and Tart Cherry Sauce

Jim turned 46 on January 14. For his birthday cake, he requested a flourless chocolate cake. Generally, I find this type of dessert too rich and too chocolatey, so I usually served it with a raspberry or strawberry coulis to tame it a bit.

This year, Sam suggested I make a cherry sauce to go with it, since cherries and chocolate "just go together." I happened to have a can of sour cherries in the pantry so decided to give it a try. Meanwhile, Jim mentioned he would like a custard sauce with it, as it is sometimes served in restaurants. Being a person who has problems setting limits, the solution was simple for me—why not do them both; and whipped cream, too.

The combination of the intense chocolate flavor and richness of the cake was balanced extremely well by the bright cherry sauce and not-too-sweet custard sauce. A dollop of barely-sweetened whipped cream was a nice garnish. The boys and I also had fun coming up with interesting ways to plate the dessert.

The cake (Double Chocolate Mousse Cake) recipe is one I have been using for more than 20 years. [Doesn't it make you feel a little old when you can refer back that far and still be talking about your adulthood?] A co-worker, from my days at UVM as a research assistant, shared it with me. It is originally from Good Housekeeping, September 1989. I omitted the glaze this time. You can find the full recipe here.

Double Chocolate Mousse Cake
2 - 8 oz. packages semi-sweet chocolate squares (16 - 1 oz. squares)
2 cups butter
1 cup sugar
1 cup half-and-half 
1 Tbs. vanilla extract
1/2 tsp. salt
8 large eggs

Preheat oven to 350.°  Grease 10” spring form pan and line it with parchment. In a saucepan heat chocolate, butter, sugar, half-and-half, vanilla, and salt over low heat until smooth and melted.

In a large bowl beat eggs slightly. Stir in chocolate mixture. Pour into prepared pan. Bake 45 minutes until a toothpick inserted 2” from side comes out clean (the middle will no longer be concave). Cool completely on a wire rack. When cool remove sides of pan. Wrap in plastic and chill at least 6 hours.


Tart Cherry Sauce

1/2 cup sugar
2 Tbs. cornstarch
1 can Oregon Red Tart Cherries
Pinch of salt

Drain cherries, reserving the liquid. Combine cherry liquid, sugar, cornstarch, and salt in a small saucepan. Bring to a boil then simmer, stirring, until thickened and the color deepens. Add cherries and cook a few minutes longer.

Remove from heat and puree using a hand blender. Strain the sauce. I added a little red food coloring (and a drop of blue) because I found the color to be a bit too drab. 

Cover the sauce with plastic wrap and cool to room temperature. Chill, if desired.


Vanilla Creme Anglaise (Custard Sauce)
1 cup whole milk
1 cup heavy cream
7 egg yolks
1/2 cup sugar
1 tsp. vanilla extract

Mix the yolks and sugar together in a mixing bowl. Set aside.

In a saucepan, bring the milk and cream to a boil. Remove from heat and whisk 1/3 of the liquid, pouring in a thin stream, into the yolks.

Pour the contents of the bowl into the saucepan and return it to medium heat. Stir constantly until the mixture thickens and comes to a complete boil. Remove from heat and strain into a clean bowl. Stir in the vanilla.

Cover the sauce with plastic wrap and chill.

Adapted from a recipe from Le Bec Fin posted on the Philly Homegrown website.

Saturday, November 26, 2011

Three Fast Family Faves—Stuffed Potatoes, Wedding Soup, Macaroons

As much as I love to cook I just don't have as much time to spend on long complicated recipes as I used to in the pre-kids days.  I find myself gravitating toward recipes that are quick, healthy and family friendly. These are two nutritious meals you can throw together easily on a week night that are sure to be a hit with kids. And for dessert some coconut macaroons.


I found the first recipe for Twice Baked Potatoes in Cooking Light  a long while back—actually before having kids, when we were eating vegetarian meals more frequently. I have been pondering lately why we have shifted to meatier meals. I think it is a combination of things. First, we used to have considerable less money so we treated meat more like a luxury. Second, we had lots more vegetarian friends. Last, when I was pregnant and nursing I really craved meat. Given how we had the boys back to back that was about three and half consecutive years, long enough to get a meaty habit well formed. Well, now I am making a more concerted effort to feed the boys vegetarian meals regularly. In truth, they do not always love meat anyway. Meatless is surely healthier as well.

The recipe is a no-brainer, really. You don't really have to measure anything. Just toss in some fillings, taste, stuff, and heat. I generally put in broccoli rather than spinach because I really love it with cheesy things.

The second recipe is for Italian Wedding Soup. My kids love meatballs. My kids love chicken soup. Italian wedding soup is like a combination of the two so what is not to love? Jim found this recipe on the internet during a brief cooking phase he went through a year or two ago. At the time, he was smitten with the pressure cooker so he made the soup in it, although it is entirely unnecessary since the soup cooks up quickly without such measures. It was actually meant to be cooked in a slow cooker, but I do it on the stove. 

You could put whatever vegetables you like in the broth. Spinach, roasted garlic, and roasted red peppers would be a nice combo, I think. Sam and Ethan and their friends like just the carrots and celery.

We went to a pool party at our friends', Curtis and Michele, house over the summer. Other guests, who have a son with several food allergies, brought coconut macaroons to share. I probably could have eaten an entire plate so naturally I asked for the recipe. They are really coconut-y, moist and chewy. And with 4 ingredients, they take only minutes to make. Their two daughters, both under 10, I think, actually made them.

Twice Baked Potatoes
(Cooking Light, October 1998)
6 servings


  • large baking potatoes (about 12 ounces each)
  • 1/2 cup 1% low-fat milk
  • 1/2 cup tub-style light cream cheese (about 4 ounces)
  • 1 3/4 cups (7 ounces) shredded reduced-fat sharp cheddar cheese, divided
  • 1/4 cup finely chopped onion
  • 1/4 teaspoon salt
  • 1/4 teaspoon black pepper
  • (10-ounce) package frozen chopped spinach, thawed, drained, and squeezed dry
  • Sliced green onions (optional)
  • Preheat oven to 400°.
  • Pierce potatoes with a fork, and bake at 400° for 1 hour and 15 minutes or until tender. Cool. Cut each potato in half lengthwise; scoop out pulp, leaving a 1/4-inch-thick shell. Mash pulp with a potato masher. 
  • Combine milk and cream cheese in a large bowl, and stir with a whisk. Add potato pulp, 1 cup cheddar cheese, onion, salt, pepper, and spinach; stir well. Spoon potato mixture into shells; sprinkle each half with 2 tablespoons cheddar cheese. Place stuffed potatoes on a baking sheet; bake at 400° for 15 minutes or until thoroughly heated. Garnish with green onions, if desired.
Easy Italian Wedding Soup
8 Dinner Servings
The recipe is from 30 Day Gourmet—Slow Cooker Freezer Favorites, 2008.


12 cups chicken broth (I generally use a little more than this)
2 cups shredded carrots (about 4 medium)
3 cups sliced celery stalks
2 lbs. ground turkey
2 eggs
1 slice white bread
2 Tbs. milk
1/4 cup grated Romano cheese
1 tsp. dried basil
1 tsp. dried parsley
Salt and pepper to taste
Acini de pepe (or other tiny pasta)


In large pot or slow cooker, add broth, carrots, and celery.  Stir.

In a large bowl, mix eggs, white bread, milk, cheese, herbs, salt and pepper to make a uniform mixture.  Add ground turkey and mix until just combined.  Form into small meatballs (1” or less) and place in pot/cooker carefully so they don’t lump together.  Place lid on and cook in a slow cooker 3-4 hours on high (8-10 on low).  On stove, bring to a boil and simmer about 15-20 minutes until everything is tender and cooked through.


Coconut Macaroons
USA Fire and Rescue video on You Tube. Weird, place to find cookie recipes, huh?


14 oz. can sweetened condensed milk 
14 oz. bag shredded sweetened coconut
1 tsp. vanilla extract
1/4 cup flour

Preheat oven to 350 degrees F.  Line baking sheets with parchment. Mix together all ingredients thoroughly. Drop by heaping tablespoons (I use a smaller scooper for this) onto parchment. Bake 10-15 minutes until golden. Slide parchment with all cookies from pan to cooling rack. Cool completely.

Optional: Melt some chocolate chips in the microwave and dip the bottoms of cookies into it. Place on waxed paper. The chocolate will harden upon cooling.

Cranberry-Buttermilk Muffins

I love muffins! Not the overly sweet, dense, and loaded-with-fat kind you can buy premade that everyone thinks are healthy, but are most often worse for you than donuts. I like a good old fashioned muffin (or scone)—not too sweet, warm, with a nice crust on the outside and a light crumb inside. I think they are best eaten warm, sometimes with a little butter, a nice cup of tea, a side of bacon or sausage for a little saltiness, and some fresh fruit. I have cooked many breakfast and brunch items, but that is just my all time favorite morning meal.


I have a few muffin cookbooks, but my favorite by far is The Ultimate Muffin Book by Bruce Weinstein and Mark Scarbrough. I think I have made more recipes from that book than from most of the others cookbooks I have combined. Graham cracker muffins with a little core of peanut butter or jelly, fresh peach muffins (truly there has not been a peach worthy of making these since moving to VT), carrot and raisin, and peanut butter muffins are the ones we eat time and again. I can't recommend the cookbook more highly if you are a muffin lover like me. 


This recipe for Cranberry-Buttermilk Muffins is not actually in the book but it is of the same muffin genre. I just found it while reading the digital version of Better Homes and Gardens on my iPad. It caught my eye because I had some leftover buttermilk. These muffins are like a cross between a muffin and a scone. They have crunchy tops, tender insides with little bursts of tart cranberries throughout. The orange zest adds a nice touch also.


[BTW, can I just say how much I enjoy reading magazines on my iPad? Some mags have extra features for ipads like videos or other interactives. But even if they don't, I love being able to keep mags without any clutter or worries about environmental impact. You can bookmark recipes, email them, etc. LOVE IT!]

Cranberry Buttermilk Muffins
From Better Homes and Gardens, December 2011

1 cup fresh cranberries
2 Tbs. sugar
2 cups all-purpose flour
1/3 to 1/2 cup sugar
4 tsp. baking powder
1 tsp. finely shredded orange peel
1/2 tsp. salt
1 egg, lightly beaten
3/4 cup buttermilk
1/4 cup butter, melted (I used a little less)
coarse sugar for topping


Preheat oven to 400° F. Grease twelve to fourteen 2 1/2-inch muffin cups. In a medium mixing bowl, toss cranberries with 2 Tbs. sugar; set aside.


In a large bowl, combine flour, 1/3 to 1/2 cup sugar, the baking powder, orange peel, and salt; stir well. 


In a small bowl, combine egg, buttermilk, and butter. Make a well in center of flour mixture; add egg mixture and cranberries. Stir just until moistened. 


Spoon into prepared muffin cups. Sprinkle tops with coarse sugar. Bake muffins about 15 minutes or until golden and a toothpick inserted comes out clean. Cool on a wire rack. Serve warm.

Thursday, October 27, 2011

Daring Kitchen Challenge: Moo Shu Pork

So, I finally became a member of The Daring Kitchen and this month participated in my first daring cooks challenges. Every month a member posts a cooking challenge which everyone makes and then simultaneously posts to their blogs.  Kinda cool to think there are other folks all over the world doing the same thing you are.


The October Daring Cooks' Challenge was hosted by Shelley of C Mom Cook and her sister Ruth of The Crafts of Mommyhood. They challenged us to bring a taste of the East into our kitchens by making our own Moo Shu, including thin pancakes, stir fry and sauce. Moo Shu is a Chinese meat and cabbage stir fry topped with hoisin sauces and wrapped in a thin toritlla-like pancake.  The boys—who are quite fond of tortillas, crepes, and anything else you can wrap food in—thought it was both fun and delicious.


This dish is simple to make which was a nice way to start my participation as a daring cook. There are three basic components: the stirfry, the pancakes, and the sauce.  If you buy the pancakes and sauce, this makes quick weekday meal for the family. It has a real homestyle feel to it—Chinese comfort food.


For the stirfry, I marinated narrow strips of pork loin in a Char Siu marinade from Eileen Yin Fei-Lo's cookbook, The Dim Sum Dumpling Book (a fun little cookbook I bought years ago. BTW, her pork bun recipe is amazing). With a hint of Five Spice, it really imparts a wonderful flavor which I was looking for because sometimes Moo Shu can be a little bland. Ethan, whose taste for meat is inconsistent at best, seemed liked he could have eaten a whole bowl of just pork. I found him standing over the wok picking out pieces of meat and had to shoo him away. They have already put an order in for a repeat meal.


In addition to the requisite ingredients of meat, napa cabbage, scallions, mushrooms, and bamboo shoots, I also included sliced onion (the boys are really into sauteed onion lately), a little carrot and green beans to give it a little color, and grated ginger and garlic to boost the flavor.


I used the recipe provided in the challenge for the pancakes. It is from The Chinese Kitchen by Deh-Ta Hsiung.  A cool trick Shelley included was how to make the pancakes really thin by rolling two pieces of dough together with a little oil in between. After you cook them, you can peel the two pieces apart. It totally worked.


For the sauce I just used Lee Kum Kee bottled hoisin.

Moo Shu Pork
This makes enough to feed 6-8 people

Pancakes
This recipe made about 30 six inch pancakes. We really only needed about half to two-thirds of that for the amount of stirfry I made. I will try freezing the rest.

4 cups all purpose flour
1 1/2 cups boiling water
1/2 tsp. canola oil

Mix flour, water and oil until incorporated. Add a little more water or flour, if needed. The dough should be firm. Wrap the dough in plastic wrap and let it rest for 30 minutes.

Divide the dough into three parts, keeping the parts you are not working with covered with a damp cloth or cellophane. Roll each into a 10" log then cut into 10 pieces. Form each piece into a ball. Take two balls and flatten them slightly. Brush a little oil (I used a combo of canola and toasted sesame oils) on one side of one disc, then press the two pieces together and roll out to a 6-8" circle on a lightly floured surface.

Cook on a dry griddle over med-high heat until blistered, but not browned, on both sides. Let it cool a little then peel the two pieces apart.

Click here for a video demonstration of the double rolling method.

Pork
1 1/4 to 1 1/2 lbs pork loin, cut into thin strips (I used boneless chops)
3 Tbs. soy sauce
1 1/2 Tbs. honey
1 1/2 Tbs. whiskey
3 1/2 Tbs. hoisin sauce
Pepper
1/2 tsp. Five Spice powder

Mix marinade ingredients thoroughly. Cover and marinate meat in the refrigerator for 4 hours or more.

Stirfry
Peanut or canola oil
6 eggs, beaten
1 medium onion, sliced
1 1/2 tsp. grated ginger root
2 cloves garlic, minced
12 oz. cremini mushrooms, sliced
5-6 cups shredded napa cabbage
one carrot, shredded
1 small can bamboo shoots, sliced lengthwise into matchsticks
1 cup green beans, cut thinly on a diagonal
2 Tbs. soy sauce
1 1/2 Tbs. rice wine
1/2 tsp. toasted sesame oil
6 scallions, sliced

Hoisin Sauce

Heat a wok or large skillet. Add a little oil. When hot, add the eggs and scramble. Remove them from pan and set aside. Add a little more oil and stir fry the veggies. Cook the veggies (onion through green beans) in batches to reduce the amount of juices that accumulate, adding those items that need longer to cook first. When they are all cooked, set the veggies aside.

Wipe your pan out then reheat it with more oil.  Remove meat from the marinade and add to pan. Stirfry in batches until just cooked through, 2-3 minutes. Stir in the veggies and eggs then add the soy, wine, sesame oil, and scallions. Toss to coat evenly.

To eat, spoon some stirfry onto a pancake, drizzle with a little hoisin sauce, and roll up.


Wednesday, September 21, 2011

New England Fish Chowder

Chowder is a culinary tradition that has been enjoyed in the northeast US for hundreds of years. Like all traditional New England cooking, it is simply prepared, but hearty and loaded with flavor. Growing up in a Catholic family in Vermont, corn chowder was a staple for Friday night dinners during the lenten season. And, of course, anyone who has ever has a good clam chowder can tell you the stuff they make in Manhattan is totally misnamed. 


Unfortunately, a lot of folks only experience chowders at diners or from cans, neither of which are adequate representations of a good New England chowder. They are unusually thick and bland—often devoid of any taste of the sea or earth at all. But a good chowder has many layers of flavor—bacon or salt pork, good stock, a little cream, fresh herbs, big chunks of potatoes, and fresh fish and/or veggies that are not over-cooked. Chowder is a hearty, one-pot supper, closer to a stew than soup. It is a perfect comfort food for a cold Fall or Winter evening's meal.


Here is a recipe I adapted from Jasper White's cookbook, 50 Chowders: One Pot Meals—Clams, Corn, and Beyond. It cooks up in under 30 minutes.


New England Fish Chowder
Serves 6 as a main course

3-4 ounces thick-sliced bacon, cut crosswise into 1/4" pieces
2 Tbs. unsalted butter
1 cup chopped onion
1 Tbs. chopped fresh rosemary
1 1/2 tsp. chopped fresh thyme
3 Tbs. flour
1 lb. baby potatoes, skin-on, cut in 3/4" chunks
3/4 cup dry white wine
3/4 tsp. salt
Freshly ground black pepper
3 cups homemade chicken stock
1 cup bottled clam juice (or use broth from 2 sm. cans of clams and toss them in at the end)
1 1/2 pounds tilapia fillets, whole
1 to 1 1/2 cups frozen succotash
1 cup half and half (or light cream)
2 Tbs. chopped fresh parsley for garnish

In a large pot, fry the bacon until crisp and the fat is rendered; remove to paper towels. Add the butter and onion and saute until they start to take on a little color. Add the herbs and flour and stir until completely combined. Slowly whisk in the wine, scrapping up browned bits from the bottom of the pot. Stir in the stock and clam juice then add the salt, pepper, and potatoes. Bring to a boil and simmer 10 minutes or so, until just tender.

Add the whole fish fillets and succotash. Cook over med-high heat for another 5-10 minutes until the fish falls apart into big chunks when you stir it. Add the half and half then taste to adjust seasonings. Serve immediately topped with fresh parsley and reserved bacon pieces. Optional oyster crackers (or plain goldfish) are a traditional accompaniment.

Saturday, September 10, 2011

Camping Cuisine Part II: Bananas Foster with Handmade Coconut Ice Cream

There are only so many nights that even the most-avid marshmallow toaster can eat S'mores on a long camping trip. When I was planning the meals for our 6-day Burton Island trip, I wanted to try something new and interesting on at least one night.  For one evening I had planned a simple dinner of red beans and rice, Andouille sausages, and grilled onions, peppers, and zucchini.  Kinda Cajun so why not finish it off with some Banana's Foster? With only a few simple ingredients and my trusty cast iron skillet, it was a snap.


Of course it cries for ice cream, which just doesn't keep well even in the best of Coleman coolers. Fortunately, it is easy to make in baggies; something I had done with the boys when they were in preschool. I decided to make coconut ice cream so our friend, Carmen, who can not eat milk products, could have some. And, well, nature surely intended that bananas and coconuts go together.

Bananas Foster
These are approximate measurements per person

1 banana, peeled and halved lengthwise
2 tsp. unsalted butter
1 Tbs. brown sugar
A sprinkle of cinnamon, optional
A sprinkle of salt
1-2 tsp. dark, spiced rum, optional


Melt the butter in a hot cast iron skillet then add remaining ingredients, except bananas. Stir to dissolve. Cook a minute until bubbly. Add the bananas and cook for a minute or two, basting them with the butter-sugar mixture until they are warmed through and slightly softened.  If you are ambitious you can add a little more liquor and flambe the mixture in true Bananas Foster style. I did not.

NOTE: Individual servings can also be wrapped in heavy foil and cooked over the fire instead of using a skillet. You can eat it right out of the foil.

Serve immediately with vanilla or coconut ice cream.


Coconut Ice Cream: The Baggie Method
Per person

1 ziploc sandwich bag
1 gallon-sized ziploc freezer bag
1/2 cup coconut milk, full fat
2-3 tsp. sugar (taste it and make it a little sweeter than you like; it will taste less sweet when frozen)
Splash of vanilla extract
2 cups ice
2 tablespoons coarse salt (I used canning salt)


Mix the coconut milk, sugar, and vanilla thoroughly and pour into the smaller baggie. Seal tightly. You can also double bag it to make sure none of the salt gets inside.

Put ice in the larger baggie and place the smaller bag inside it. Shake and massage the bag, kneading the cream in the smaller baggie so it freezes evenly. After 5-10 minutes it will be the consistency of soft-serve. It will get harder if you continue beyond this.

Remove the smaller bag. Cut a hole in the corner and squeeze it into a serving bowl.

NOTE: The baggie will have salty water on the outside of it, which you should rinse off (unless you double-bagged) before cutting open to keep the salt water from dripping into your ice cream as you squeeze it out.